If you’ve ever fired up a stand-up griddle only to notice the grease pooling in one corner, or watched pancakes slide sideways instead of cooking evenly across the surface, you’re not alone. As a supplier of commercial and residential stand-up griddles, I field at least three questions a week from new and repeat customers alike: “How do I level a stand-up griddle properly?” and “Why does leveling even matter?” Stand Up Griddle

I get it—when you’re rushing to prep a batch of breakfast burritos for a brunch service, or testing a new pancake recipe for your weekend cookout, leveling might feel like a unnecessary step that’s wasting time. But here’s the thing: a misleveled griddle isn’t just an inconvenience. It’s a waste of fuel, a hazard from pooling grease, and it can ruin perfectly good food before it even hits the serving line. After over a decade working with these griddles—selling them, troubleshooting them, and helping everything from small cafes to large catering companies get the most out of their equipment—I’ve learned that leveling a stand-up griddle is actually straightforward, as long as you follow the right steps, and avoid the common mistakes that make people skip it.
Let’s start with why leveling is non-negotiable, because once you see the impact, you’ll never skip it. First, heat distribution. Most stand-up griddles, especially commercial ones, have burners or heating elements along the bottom. If the griddle surface is tilted, the heat won’t be consistent across the whole plate. One side might be hot enough to char a burger in two minutes, while the other is lukewarm, leaving meat undercooked. For residential users, that means burnt edges on pancakes and undercooked centers; for restaurants, that leads to customer complaints, wasted ingredients, and longer ticket times during peak service.
Then there’s grease management. Grease and cooking liquids don’t evaporate evenly on a tilted surface. They flow downhill, pooling in the lowest corner. That doesn’t just make cleaning a nightmare—pooled grease can splatter when it hits hot surfaces, creating a burn risk for cooks. It also takes longer to vent out, which can affect air quality in your kitchen or home and even trigger smoke alarms if you’re working in a small space. For commercial kitchens, local health codes often require proper drainage of cooking oils, and a misleveled griddle can lead to failed inspections. Finally, misleveling puts unnecessary stress on the griddle’s components. The legs, the frame, and even the heating elements can wear out faster if they’re constantly under uneven pressure, leading to costly repairs or replacements sooner than you’d expect.
Now, before you grab a level and start adjusting, you need to make sure you’re set up for success. I’ve seen people waste time with the wrong tools, so let’s talk about what you actually need. First, the right level. A standard 2-foot bubble level works, but I recommend a longer 4-foot level if you’re leveling a commercial stand-up griddle, because it covers more surface area and gives a more accurate reading across the whole cooking plate. Digital levels are even better, because they show exact degree readings, which is helpful if you’re working with a specific tolerance. You’ll also need a wrench or adjustable pliers (most griddles have adjustable leg bolts, so this is key), a rubber mallet (for tapping legs into place if they’re stuck), and a rag to wipe down the griddle surface so you’re working on a clean, flat base—no crumbs or grease adding tiny uneven spots that throw off your reading.
Wait, one more critical prep step: make sure the griddle is in its permanent spot, where you’ll use it regularly. A lot of people level their griddle on a temporary setup, like a workbench, only to move it to its final location later, where the floor might be uneven. Flooring varies a lot—concrete in basements can have subtle slopes, tile floors might have grout lines that create small gaps, and wooden floors can shift over time, especially if you’re moving heavy equipment on them. So find the exact spot where you’ll plug it in, vent it (important for gas griddles—never leave a gas line kinked or the unit too close to a wall), and work there.
Now, let’s get into the actual step-by-step process, which I’ve refined over hundreds of griddle setups. I’m going to break this down for both gas and electric stand-up griddles, since they have slightly different components, but the core leveling method is the same.
First, start with the griddle at rest, turned off and cool. Never level a hot griddle—metal expands when heated, so you’ll get a false reading, and you could burn yourself. Wipe the entire cooking surface clean with a degreaser and a rag, then let it dry completely. Next, take your long level and place it along the length of the griddle, from one front leg to the back leg on the same side. Look at the bubble in the level: if it’s closer to the front of the griddle, that means the front is lower than the back; if it’s closer to the back, the back is lower. For this step, you’re adjusting the two back legs or two front legs to get the bubble dead-center.
Once the bubble is centered along the length, move the level across the width of the griddle, placing it from the left front leg to the right front leg. Do the same check here: if the bubble is closer to the left, adjust the left leg up or down; if it’s closer to the right, adjust the right leg. Then repeat the cross-width check at the back legs to make sure the entire width is level. Wait—don’t skip this cross-check. I’ve had customers call me frustrated because their griddle was level front to back, but one side was tilting left to right, leading to grease pooling on that side. It takes an extra minute, but it’s worth it.
Here’s where the adjustable legs come in: most stand-up griddles have legs with threaded bolts that you can turn to raise or lower each corner. For residential griddles, the legs are often adjustable with a wrench or even by hand if they’re light-duty. For commercial griddles, the legs have heavier bolts, so you’ll need a wrench or adjustable pliers. A quick tip: if you turn the leg clockwise, it will raise that corner; turn it counterclockwise, it will lower it. Make small adjustments—turning a leg a full quarter turn at a time is way too much. Make a tiny adjustment, check the level, then adjust again. This is not a race.
Once you think it’s level, double-check it. Move the level along the full length again, then the full width, then even diagonally from one back corner to the opposite front corner. If the bubble is centered on all three axes (length, width, diagonal), you’re good. For extra accuracy, you can place a glass of water on the griddle surface—if the water stays still and doesn’t flow to any corner, that’s a simple test to confirm.
Wait a second—what about gas vs. electric? Let’s clarify. For gas stand-up griddles, after leveling, you should also check the burner alignment. I always recommend lighting the griddle, turning all burners to medium, and letting it heat up for 10 minutes. Then, hold your hand a few inches above the surface—if the heat is even across the whole griddle, you did it right. If one side is hotter, double-check your level, because that’s usually a sign that the surface isn’t perfectly flat, so the heat isn’t distributing evenly. For electric griddles, the heating elements are usually more consistent, but you still want to confirm that the entire surface cooks evenly, since a tilt can still make grease pool and affect cooking times.
Now, let’s talk about common mistakes that people make that ruin their leveling work. The biggest one is rushing the process. I’ve seen a guy adjust a griddle in 30 seconds, only to call me a week later because his burgers were always undercooked on one side. Another mistake is not accounting for the griddle’s weight. If you have a heavy commercial griddle (they can weigh 200+ pounds when full of food and grease), adjusting legs that are stuck can mean you have to lift a corner a little to get the bolt to move. Don’t try to pry or use excessive force—tap the leg gently with a rubber mallet to loosen it, then adjust. If you force the bolt, you can strip the thread, and that’s a repair that will cost you more than the time you took to level it properly.
Another common mistake is forgetting to re-check the level after you connect the gas line or plug in the griddle. Sometimes, the process of moving the unit to hook up utilities can nudge a leg just enough to throw the level off by a fraction, which is enough to cause problems. Always do a final check after all connections are made. And one more: if you move your stand-up griddle often—like if you use it for catering events or take it to tailgates—you’ll need to re-level it every time you move it. A tiny shift in position on a new floor will throw it off.
So, what does a properly leveled griddle look like in practice? For breakfast chefs, it means every pancake cooks to a uniform golden brown, no burnt edges or raw middles. For burger flippers, it means even browning on both sides of every patty, no greasy puddles forming around the grill. For caterers, it means no lost ingredients to pooled grease, faster clean-up, and passing health codes with ease. I’ve seen a small family-owned diner cut their pancake waste by 15% after leveling their griddle, just by fixing a tilt that they didn’t even notice for three years. That’s the kind of small adjustment that makes a big difference.
If you’re in the market for a new stand-up griddle, or if your current one is acting up, keep these points in mind when you’re setting it up. If you’re not confident adjusting the legs yourself, don’t hesitate to reach out—we offer setup support for all our customers, whether you’re ordering a residential unit for your home or a commercial one for your restaurant. We know that buying a griddle is an investment, and you want it to work as well as possible from day one.
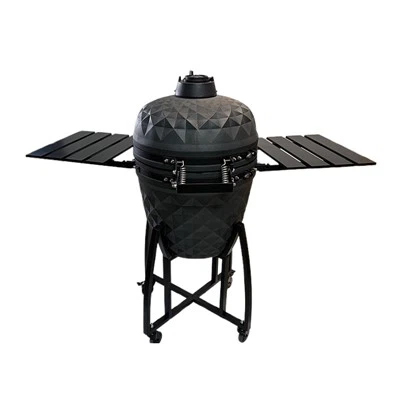
If you’re ready to upgrade your current unit or get a new stand-up griddle for your home or business, don’t hesitate to connect with our team to discuss your needs, whether you’re looking for a compact unit for weekend cookouts, a heavy-duty model for daily restaurant use, or something in between. We’re here to help you get everything you need to cook great food, from the right equipment to setup tips that make your job easier.
Pellet Grills References:
- National Restaurant Association. Commercial Kitchen Equipment Setup and Maintenance Guide. 2022.
- Consumer Product Safety Commission. Burn Prevention Tips for Cooking Appliances. 2021.
- Food and Drug Administration. Food Service Equipment Leveling Requirements for Health Code Compliance. 2023.
- Griddle Manufacturers Association. Best Practices for Stand-Up Griddle Installation and Maintenance. 2020.
- U.S. Department of Energy. Energy Efficiency Tips for Commercial Cooking Equipment. 2022.
Huzhou Blue Carp Co., Ltd.
With abundant experience, we are one of the most professional stand up griddle manufacturers in China. Please rest assured to wholesale cheap stand up griddle for sale here from our factory. If you have any enquiry about custom service, please feel free to email us.
Address: Longxi Subdistrict, Huzhou South Taihu New Area, Huzhou City, Zhejiang Province, China
E-mail: tonycheung@bluecarpbbq.com
WebSite: https://www.bluecarpbbq.com/
