Hey there, Office Chair Base

Let’s cut to the chase: If you’re reading this, chances are you just glanced down at your office chair and saw a spiderweb of cracks snaking across its base. Maybe you leaned too hard in a meeting, rolled over a loose floor tile, or that worn-out, overworked chair of yours finally gave in after years of back-to-back crunch time. As someone who’s been selling office chair bases for the better part of a decade—working with everything from tiny home offices to 500-person corporate facilities—I’ve seen this exact problem hundreds of times. And here’s the thing: most people try to fix it with random glue from their junk drawer, and end up right back here a month later. That’s why I’m putting together this step-by-step guide to fixing a cracked plastic office chair base, backed by the kind of practical, supplier-specific know-how I only pick up from seeing thousands of these bases come in for replacements (and watching customers fumble through fixes).
First, let’s get one critical thing out of the way: Not every crack is worth fixing. I’ve had customers call me in a panic because their base has a 1-inch scratch, but that’s not a structural crack. A structural crack is one that’s running along the load-bearing arms of the base (the ones that connect to the casters and hold the gas lift), is longer than 2 inches, or appears near the center pivot point where the gas lift screws in. If your base has a crack that’s deep enough to see through, or if when you sit in the chair it feels wobbly, don’t mess around—replace it. But if it’s a minor to moderate crack on a load-bearing arm, or a smaller crack on the outer, non-weight-bearing portion of the base, this fix will buy you 2+ years of reliable use, and save you the cost of a new chair (or an emergency base order) in the short term.
Now, let’s talk about the science behind plastic chair bases, because this isn’t just about gluing two pieces together. Most office chair bases you’ll find (and the ones we supply) are made from high-density polyethylene (HDPE) or polypropylene (PP) plastic. These are tough, flexible plastics designed to take daily wear, but they don’t bond well with regular super glue or even hot glue—those materials will pull right off because they can’t form a molecular bond with the plastic. That’s the mistake 80% of DIYers make. For this fix, you need a specialty adhesive that’s formulated for these specific plastics: a two-part epoxy that’s rated for HDPE/PP, or a plastic welding rod paired with a hot air tool. I’ll walk through both methods, because I’ve seen both work well when done correctly.
Before you grab any supplies, gather your tools. For the epoxy method (the one I recommend for most people, since it’s less intimidating than welding), you’ll need: a clean, dry cloth, rubbing alcohol (90% is best, not the 70% stuff), a utility knife or sandpaper (80-grit works well), masking tape, and that two-part HDPE/PP epoxy. For the plastic welding method (better for deeper cracks or high-stress areas), you’ll add a hot air tool (set to 350-400°F) and matching plastic welding rod (same type as your base, usually HDPE). Skip the cyanoacrylates (super glue) with plastic accelerant—they often fail under the repeated stress of a rolling office chair.
Let’s start with the prep work, because this is 70% of a successful fix. First, flip your chair upside down so you can access the base, and remove all the casters. If there are any nuts or bolts holding the base to the gas lift, remove those too—this gives you a flat, unobstructed surface to work on, and keeps adhesive or welding fumes from getting on your chair’s seat or gas lift. Next, clean the crack and the surrounding area thoroughly. Wipe it down with rubbing alcohol to remove any dust, grease, or old dirt—grease is the number one reason epoxy fails. If the crack has any rough edges from being dropped or worn, use your utility knife to trim them down, or sand the area lightly. For epoxy, you’ll want to rough up the area around the crack a bit (the 80-grit sandpaper works here) to give the adhesive more surface to grip. For plastic welding, a light sanding to remove the top layer of glossy plastic will help the weld bond better.
Now, let’s get to the actual repair. We’ll start with the epoxy method, which is what 90% of our customers use for on-site fixes. First, apply masking tape to the backside of the crack—this keeps the epoxy from seeping through as it cures. Mix your two-part epoxy exactly as directed on the packaging—don’t eyeball it. Most epoxies call for a 1:1 ratio, and mixing too little or too much will mess up the curing time and strength. Once mixed, apply the epoxy generously to the crack, making sure to fill every gap. If the crack is deep, you can build it up in thin layers, waiting 15 minutes between each, to avoid sagging. Smooth the top with a plastic spreader or the edge of a credit card to remove excess epoxy, then wipe away any drips immediately with rubbing alcohol before it sets. For this step, I always tell customers to err on the side of more epoxy than less—under-filling a crack will leave weak spots, especially on load-bearing areas.
If you’re going the plastic welding route, here’s where the science gets a bit more hands-on. Heat your hot air tool to the recommended temperature (check the welding rod packaging—most HDPE rods work at 350-400°F). Hold the hot air tool at a 45-degree angle to the crack, and heat both sides of the plastic for 10-15 seconds until they start to soften (you’ll see a slight sheen, but don’t melt them completely into a mess). Then, hold the welding rod to the crack, and feed it into the gap as you move the hot air tool along the length of the crack. Keep the rod and tool moving at a steady pace to avoid overheating or under-welding. Once you’ve filled the entire crack, let it cool completely—this takes about 10 minutes, so don’t rush it. Once cool, you can sand the excess weld flush with the base for a smooth finish.
Now, the most important part after the repair: curing and testing. For epoxy, follow the curing time on the packaging—most need at least 24 hours to reach full strength, so don’t flip the chair right away. For plastic welding, the base is usually ready to use after 1 hour, but I still recommend waiting overnight if you repaired a load-bearing arm. Once it’s fully cured, inspect the repair. If you used epoxy, make sure there are no gaps, and if you used welding, check that the weld is smooth and no weak spots are visible. Now, test it gently: sit on the chair, shift your weight side to side, roll it across the floor. If it feels wobbly or the repair creaks, you might have missed a spot, and you’ll want to reinforce it with a small metal bracket (I’ve had customers add a 1-inch metal L-bracket to the underside of load-bearing arms for extra stability, which works great).
Wait a second—what if the crack is on a non-load-bearing part of the base? Like the outer rim that doesn’t touch the floor, or a small edge that doesn’t hold any weight? In that case, even a simpler fix works, but don’t skip the prep still. I had a customer last year who cracked the outer rim of his base from moving it too roughly, and he fixed it with a thick layer of epoxy and a sprinkle of plastic shavings (sand the base to get shavings, mix them into the epoxy) to reinforce the bond. That lasted him two years before he upgraded to a heavier-duty base for his growing team.
Now, let’s talk about when to skip the repair entirely, because as a supplier, I’d rather help you order a replacement base that works long-term than have you waste time on a fix that fails in a month. If your crack is longer than 4 inches, runs within 1 inch of the center pivot point, or if the base has already had two previous repairs, it’s time for a new one. Plastic fatigue is a real thing—once a base has been stressed and repaired multiple times, the plastic is weaker, and another crack will likely form in the same spot. We supply a range of bases, from lightweight 5-legged bases for home offices to heavy-duty 5-point steel-reinforced HDPE bases for high-traffic corporate spaces, so if you’re at that point, a replacement is way more cost-effective than repeatedly patching a broken base.
I also get asked a lot if you can use metal epoxy or steel-reinforced putty for these repairs. The short answer: only for non-load-bearing areas. Steel putty is heavier than HDPE plastic, and if you use it on a load-bearing arm, it will throw off the balance of the base and cause more stress on the adjacent parts, leading to more cracks down the line. Stick to adhesives rated specifically for HDPE/PP for any load-bearing repairs.
A few pro tips I’ve picked up over the years, straight from the supplier floor: First, keep a spare tube of the right epoxy or a welding rod on hand for emergency repairs—we’ve had customers call us at 8 a.m. on a Monday, panicking that their entire office floor is going to get destroyed when their only chair breaks. Second, when moving your office chair, lift it by the seat, not by the base. That tiny habit is one of the biggest causes of base cracks, especially if you have carpet or uneven floor surfaces. Third, if you work in a high-traffic area, look for bases with reinforced arms—those are made from thicker plastic that resists cracking far better than standard thin-walled bases.
I’ve seen DIY fixes that work, and I’ve seen them that make a small crack into a bigger, more expensive problem. The key is to match the repair method to the type of crack and where it’s located, not just grab the first adhesive you see at the hardware store. As someone who ships hundreds of office chair bases every month, I’ve tested these repairs myself (I’ve definitely fixed a few bases in my own home office that I’ve had for years) and know that when done right, they work.
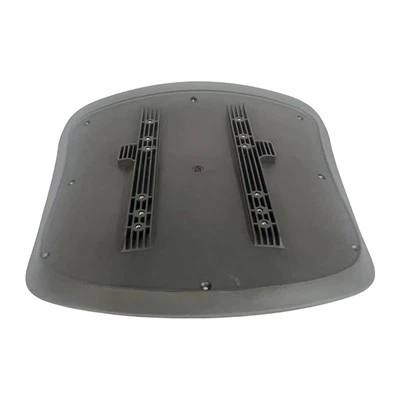
If you’ve tried a fix that didn’t hold, or you’re looking to upgrade your entire fleet of bases to reduce these cracks long-term, don’t hesitate to reach out. We supply bases for all types of office setups, from small home offices to large corporate campuses, and can help you find the right solution that fits your needs. Whether you need a replacement for that cracked base or want to stock up on spares for your team, we’re here to help.
Office Chair Base References:
- ASTM International. (2018). Standard Specification for High-Density Polyethylene (HDPE) Plastic for Office Furniture Components. ASTM D4101-18.
- Plastics Industry Association. (2021). Adhesion Guidelines for Thermoplastic Polypropylene (PP) and High-Density Polyethylene (HDPE). PIA Technical Bulletin 12-21.
- Office Furniture Manufacturers Association. (2020). Best Practices for Maintaining Office Chair Structural Components. OFMA Guide 3.
Dongguan Weihong Furniture Co., Ltd.
As one of the most professional office chair base manufacturers and suppliers in China, we also support customized service. We warmly welcome you to buy high quality office chair base made in China here and get pricelist from our factory. For price consultation, contact us.
Address: No.145, Qingzhang Road, Changshantou Village, Qingxi Town, Dongguan City, Guangdong Province, China
E-mail: 1243042726@qq.com
WebSite: https://www.whfurni.com/
